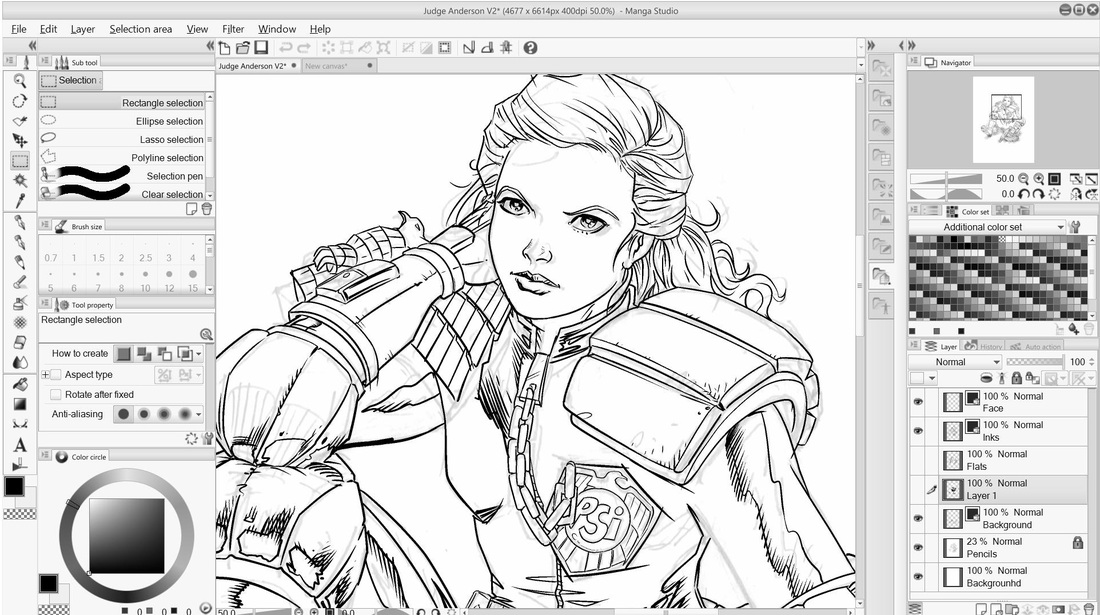
Back to the illustration - I reduce the opacity of the pencil image until I can see just faint lines and then work over it on a separate layer using the standard inking brush in Manga Studio. The Surface Pro is pressure sensitive so I'm able to draw directly onto the screen using a stylus, which is much more intuitive than using a separate tablet. I choose to work on a vector layer rather than a raster layer because of the added editing controls available, although the real world feel is dampened. As you can see below, from there it is pretty much a case of drawing in the lines and filling in the black areas and, before you know it, the illustration is finished. Well done me.
|
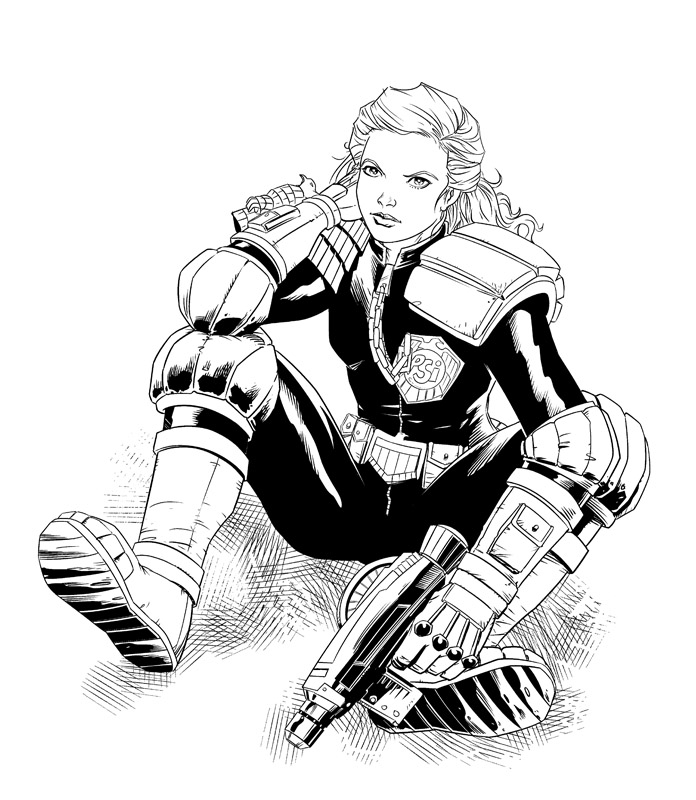
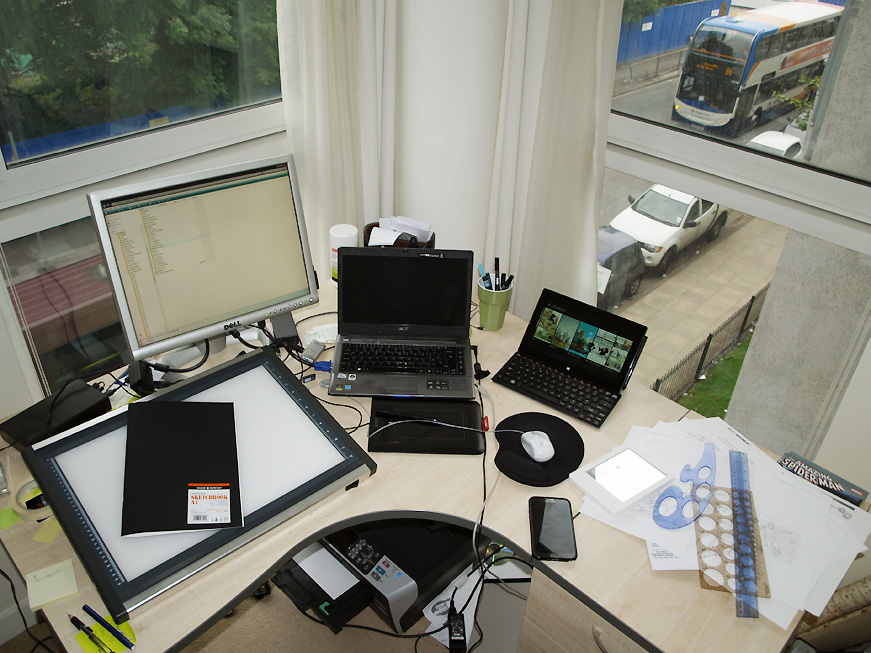
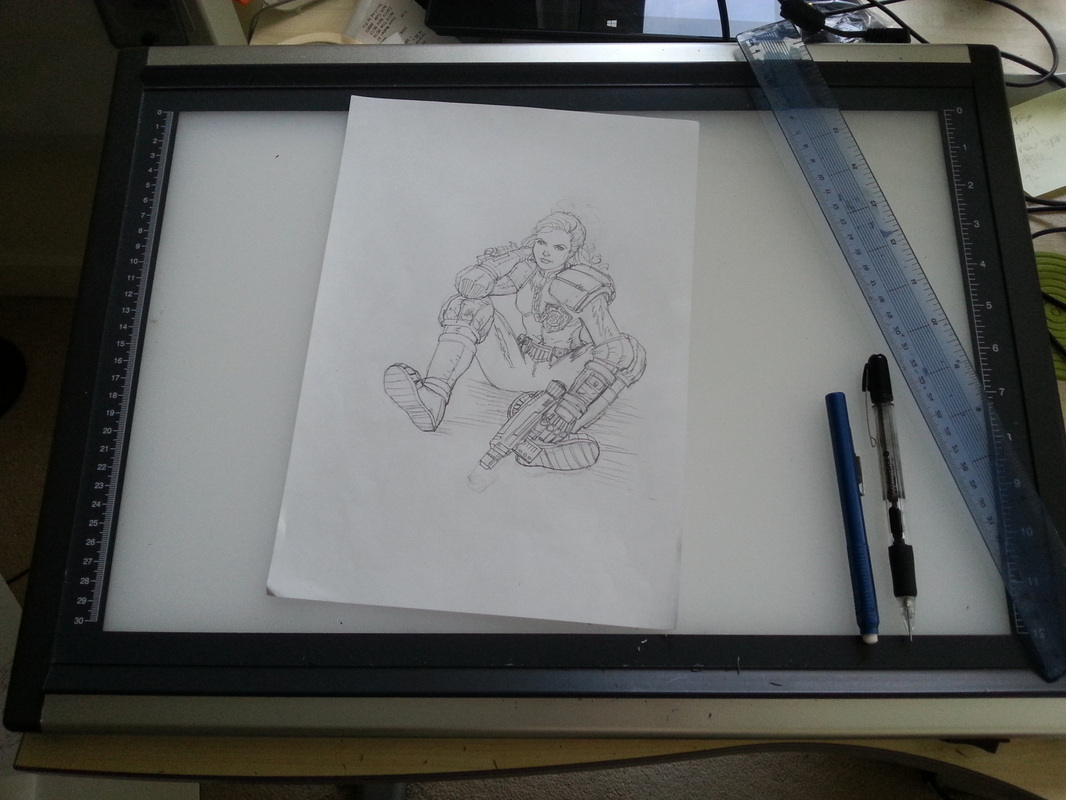
I recently made changes to some key aspects of my illustration workflow to improve productivity and creativity. Although I still rely on traditional pencil and paper for roughs and doodling concepts, the majority of my illustration output is now produced digitally. Here's an illustration I've produced of Judge Anderson from the pages of 2000 AD using Microsoft Surface Pro table (hardware) and Manga Studio 5 (software): review Below is a snapshot of my work area, and the number 86 bus from Chorlton to Manchester! On the desk to the left is my sketchpad sitting on top of the lightbox where I do most of my initial drawing. In the middle is an Acer laptop, Wacom tablet and Dell matt screen monitor, mainly used for final artwork edits and where I do all my colouring. work. To the right of that is the Surface Pro which I use with a separate keyboard and stylus to produce the black and white artwork. I'll provide a more detailed breakdown of my working process at a later date, but briefly in this example I found some ref and then did a very rough pencil drawing, tweaked it in photoshop and printed it out on photocopy paper. I then turn the paper over facedown and placed it on the lightbox so that when it's switched on I am able to see the image come through from the underside. A detailed pencil drawing is then completed on the blank side of the photocopy paper like so: The pencil drawing is scanned into the computer, enlarged to 150%, and loaded into Manga Studio where I work at a resolution of 400dpi. The layout/user interface on the latest version of Manga Studio is not dissimilar to photoshop, which is a good thing as the learning curve is minimal, but the great advantage is that it is set up with tools that enhance the workflow for a comic artist or illustrator. The price is ridiculously good value for a professional standard piece of software, and many an artist will find it has enough of a toolset not to need to upgrade to the high end edition.
Back to the illustration - I reduce the opacity of the pencil image until I can see just faint lines and then work over it on a separate layer using the standard inking brush in Manga Studio. The Surface Pro is pressure sensitive so I'm able to draw directly onto the screen using a stylus, which is much more intuitive than using a separate tablet. I choose to work on a vector layer rather than a raster layer because of the added editing controls available, although the real world feel is dampened. As you can see below, from there it is pretty much a case of drawing in the lines and filling in the black areas and, before you know it, the illustration is finished. Well done me.
3 Comments
Raven
23/9/2016 02:17:51 pm
How do you do not mess up?
Reply
Raven
23/9/2016 02:13:42 pm
Hi this is girl who is writing a comic book called The Mystic Lady and I am was wondering if you have any tips on how to write a comic book
Reply
Your comment will be posted after it is approved.
Leave a Reply. |
Author ManchesterAndrew Chiu is a UK based illustrator working in comics and children's books, concept art, editorial, as a storyboard artist and visualiser, and any other area of illustration that will have him. All images on this blog are copyright of the publishers unless otherwise stated. Contact DetailsArchives
December 2018
Categories
All
|


 RSS Feed

